Deciphering Fish Finders – Part 1
One of the most common questions I get asked about, both through this site and when out at the jetty, is to do with how to understand, or, more accurately, decipher, the images that are displayed on the fish finder. Having used one for many years it now is almost second nature to know what I am looking at on the screen- but for the new user, or someone that is upgrading from an older unit, I understand it can look like an incoherent jumble when looking at the raw data, which is what you do need to be looking at!
So I’ve spent a bit of free time over the Christmas holidays going through a few images that I have “screen captured” – to show some useful examples that you can use to help interpret what you are seeing on your own unit.
Firstly let’s look at side imaging:
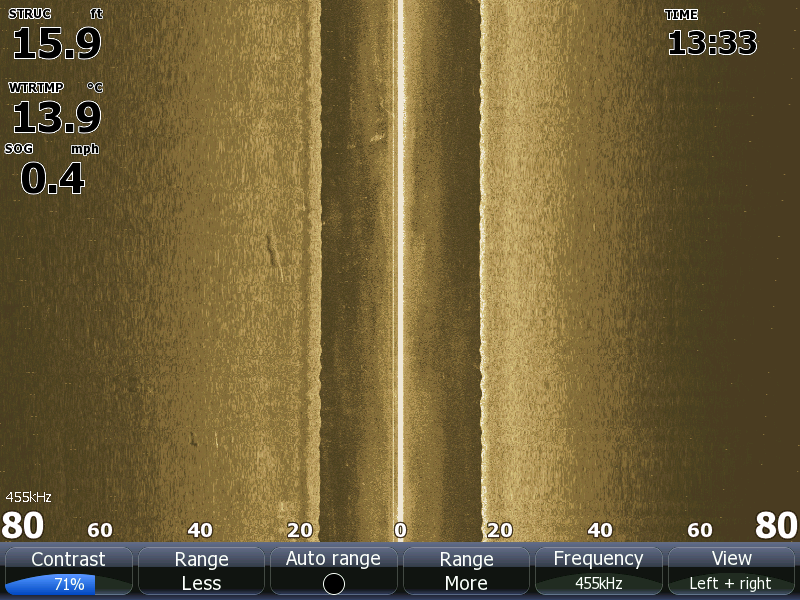
To those who haven’t used side imaging before this image may look a bit strange and bland. But, when you are used to interpreting them, quite a lot of things jump out. I must say that this is quite a typical image return from a side imager on most UK waters, most are quite disappointingly uniform, so you need to manage your expectations when using one, not every square metre of water is bristling with features!
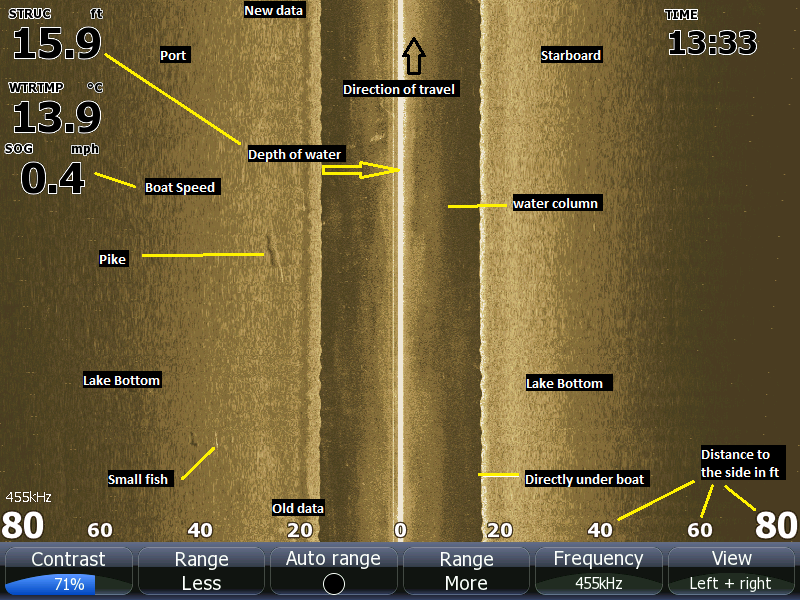
Firstly the black bit in the middle is the water column – this is shown either side of the boat as that is how the transducer works. (Think of it as a standard fish finder but on its side) any fish directly under the boat will be shown here. The brown / grey area after this is the bottom of the lake to a distance either side of the boat. The screen scrolls from the top down, so the most recent part of the water the transducer has covered will be at the top of the screen.
On this image there are also a couple of fish, one is most likely a pike (I can’t say this for sure, but from experience I think it is) the giveaway is the acoustic shadow the fish casts, showing it is slightly off the bottom, these “shadows” are often easier to spot than the fish themselves sometimes.
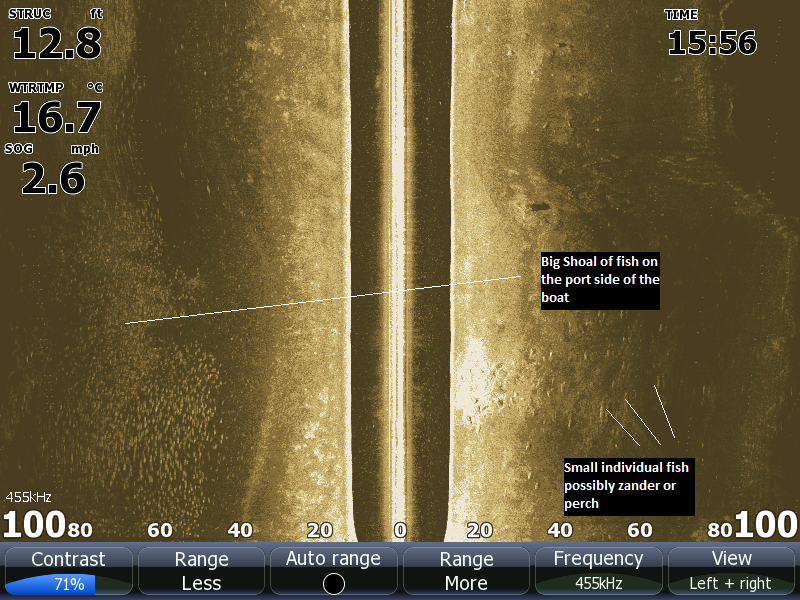
Sometimes with side imagers they capture things that you can’t really miss, this shoal of bream was approximately 300 yards long on the tidal Severn. Interestingly, you can see some other smaller fish slightly off the shoal. I suspect these were perch or small zander.
The next image is down scan of the same area, here you can see the individual fish as they mill around in the shoal. It is often the case on rivers that you can go for miles without seeing a thing, then find all the fish in the section all together like this.
The next image shows something more interesting, again on the tidal Severn, it shows an area of heavy snags, obviously dead trees that have been in the water for some time as they have gathered other debris around them, and have caused a shaping of the river bed around them. It is these depressions and rises that can be a magnet for zander, not the snag itself. In the image you can see the larger individual zander laying quite away from the snag itself.

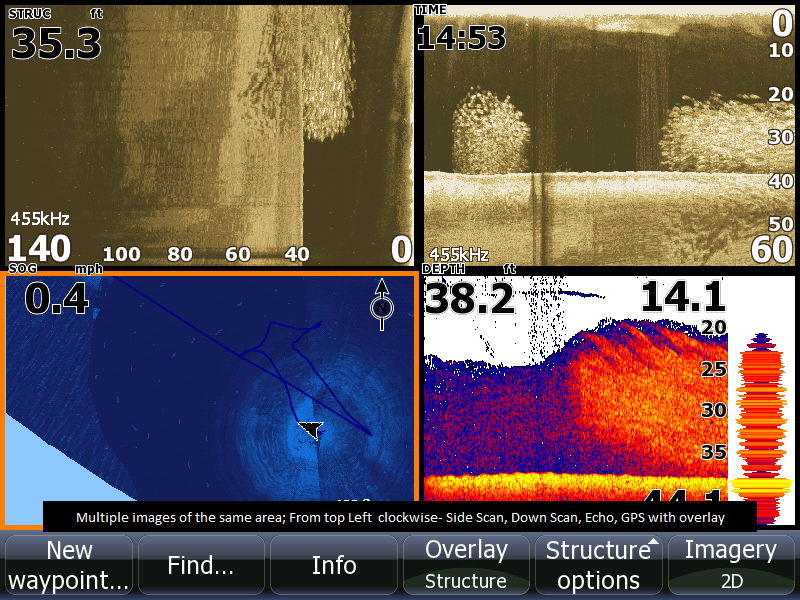
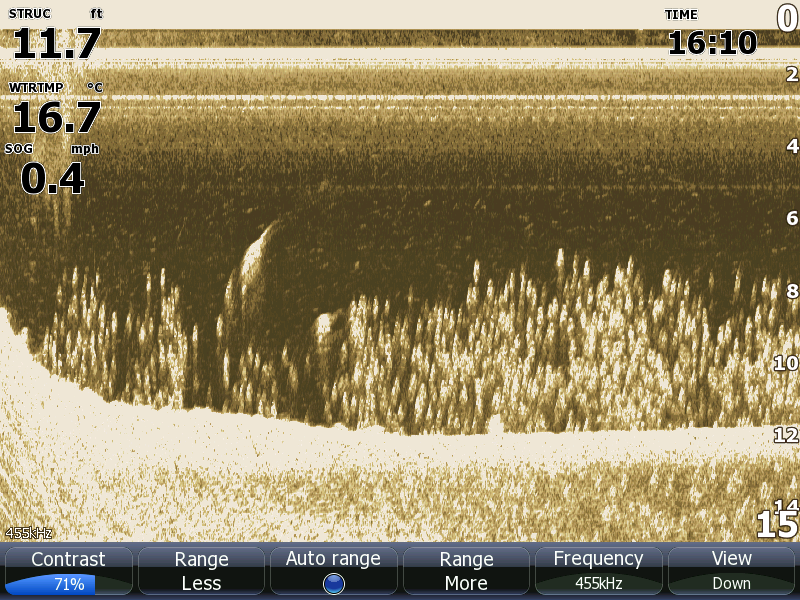
Side imaging is also very useful for looking for clear areas in weedy waters. In this image you can clearly see the gap in the weed extending either side of the boat. On the standard echo sounder image shown in the top right all you see is a 2D representation of it, so it would require multiple passes to get a clear picture of this channel.
The GPS view in the bottom right shows the spots I have marked on this channel, this enables me to see the full meandering picture of it and decide where to place my baits.

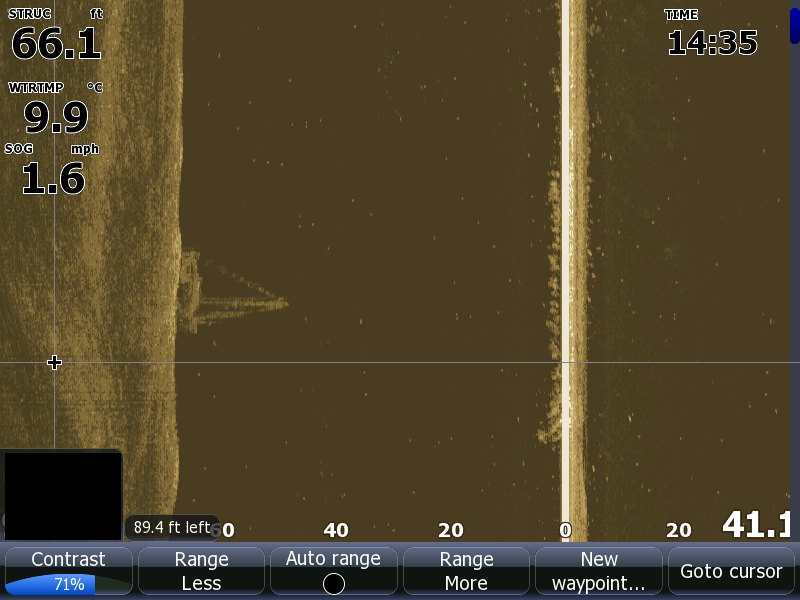
Sometimes you see some things that you don’t expect to. How does a boat sink and all the rigging stay in place?
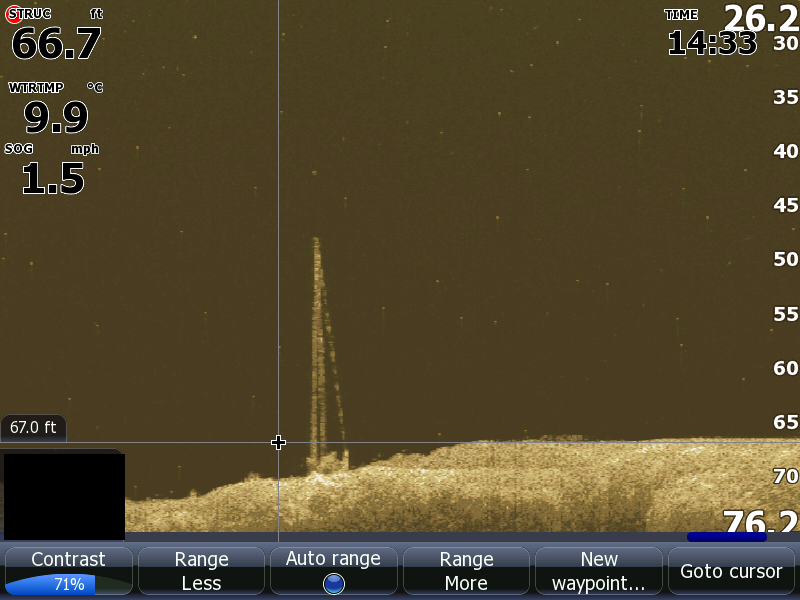
A down scan of the same area;
I hope you found that useful, in the next episode we will look at interpreting echo soundings and GPS tracks.