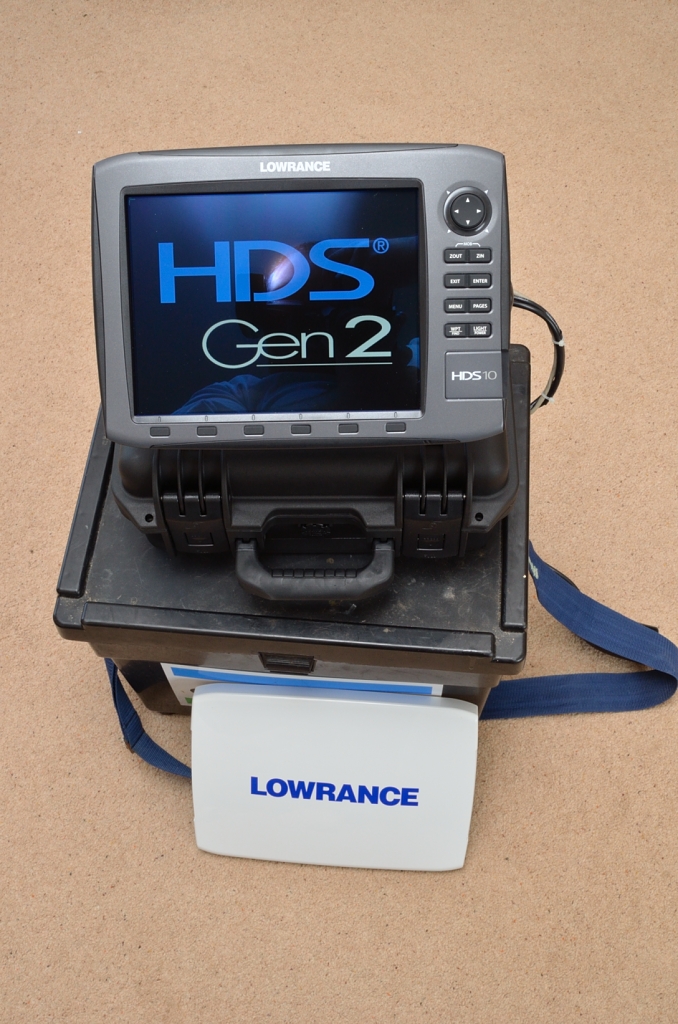
Lowrance HDS – Portable set up
Lowrance HDS / Structure Scan set up.
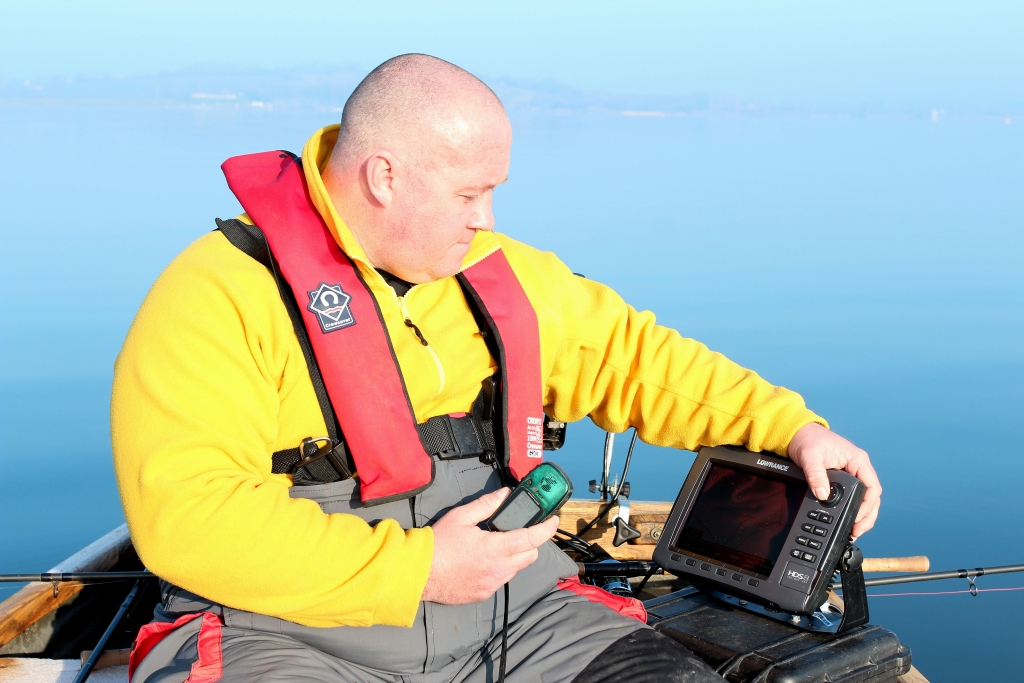
I’ve recently had a few enquires about the Structure Scan unit I am currently using, and how I rigged it up to be portable.
Most of these units are big and bulky and are designed for permanent fixture to your boat – which is fine if you are just going to use it on one boat, but what if you want to use it on multiple vessels? How about if you want to use it on a Trout Water where you can’t use your own boat? For these reasons, I’ve rigged mine to be portable, which is a bit of a misnomer, as it’s still a lot of kit, batteries, and transducers, to carry around, but if you want to use high- tech “Gucci” toys like this you get used to it.
Anyway it’s a bit difficult to talk you through how to rig one up, and it’s not that straight forward to do the conversion if you haven’t done similar before, so I’ve produced a quick walk- through on how to wire up a Lowrance HDS unit with separate Structure Scan.
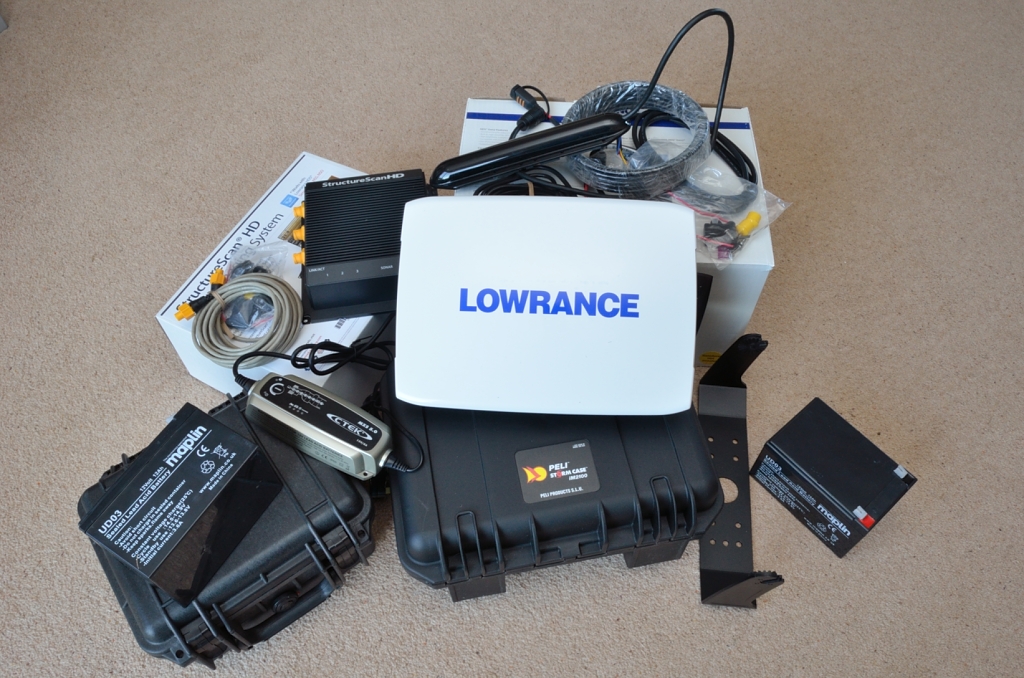
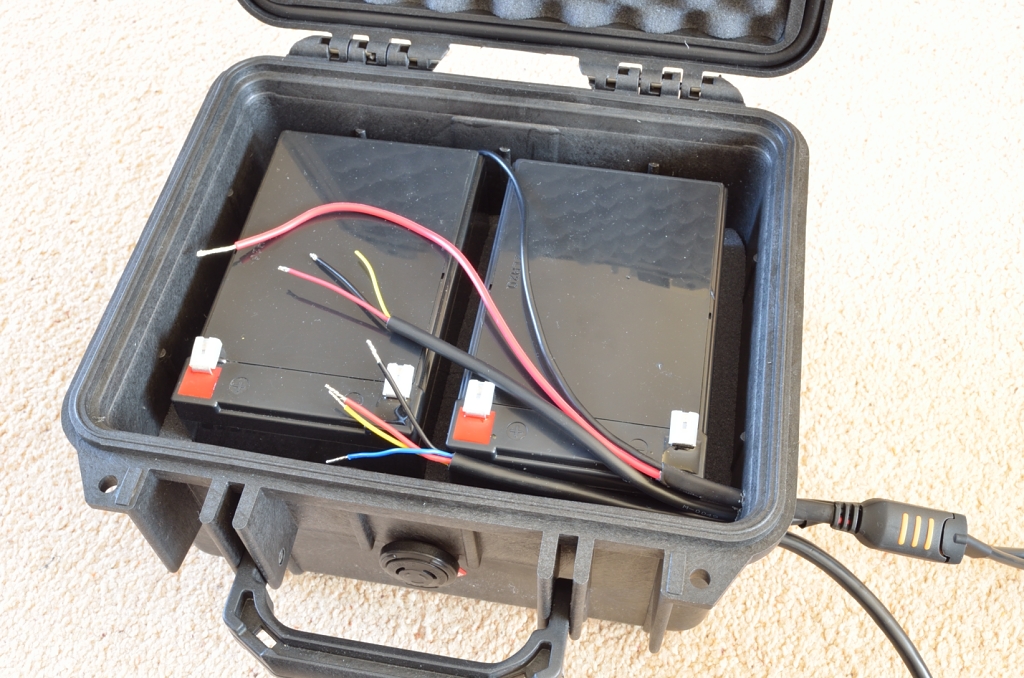
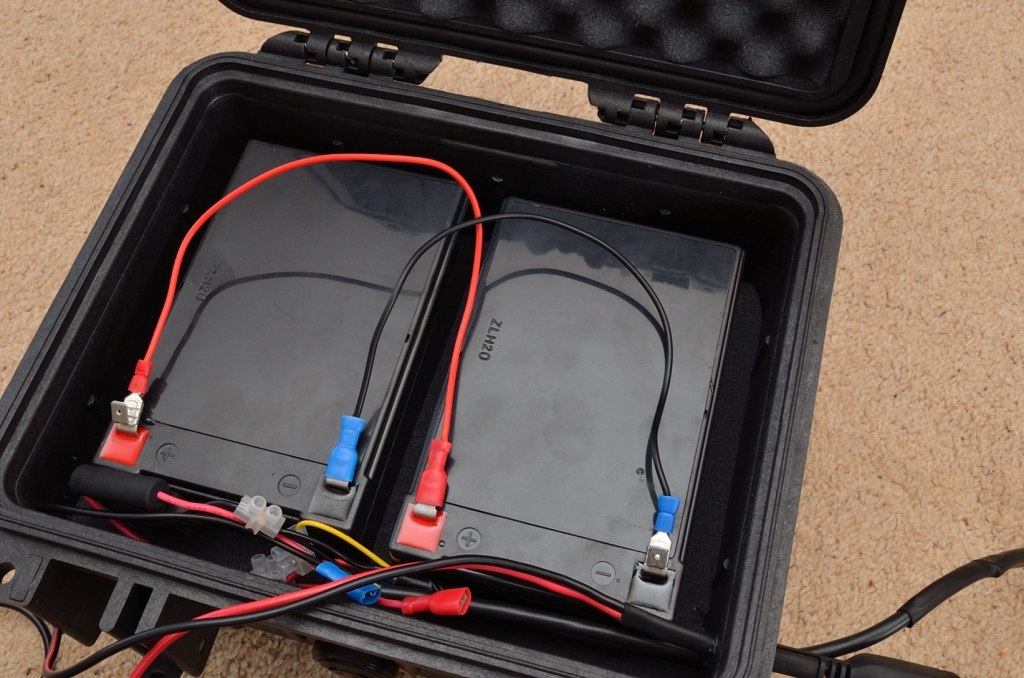
Firstly you are going to need to get all the stuff you require, I like to mount my batteries into a Peli case – this keeps them secure and the wiring waterproof.
For the batteries I use two 12v 12Ah batteries rigged in parallel (positive to positive and negative to negative), these are generally used for mobility scooters or golf buggies, and are quite heavy. You can use lighter lithium ion batteries, but, for the same rating, they cost a bomb.
Obviously you are going to need some electrical connectors, and tools, you are also going to need another Peli case for the HDS unit itself, and I put all the equipment, once set up, in a seat box for easy transportation.
I am also going to rig this with an attachment for the battery charger, so it’s a simple plug- in when you get home to charge them up, so you will need a Ctek charger for this, I use the Ctek MXS 5.0.
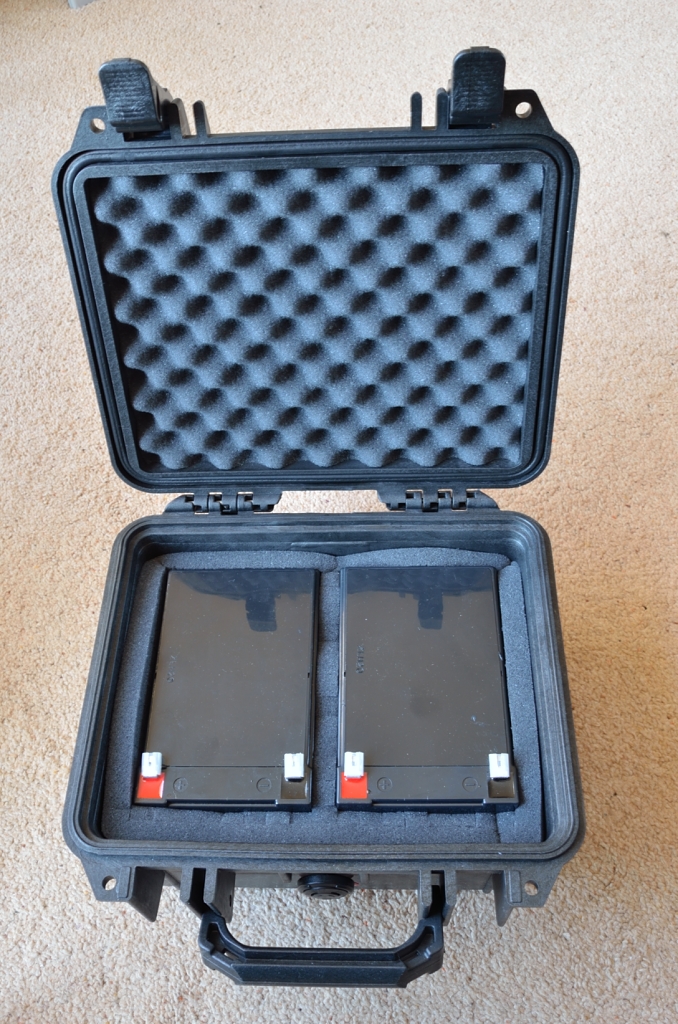
Once you have all your gear, the next thing you need to do is take the foam out of the Peli case and fit in your batteries. For these size batteries I use a 1300 size Peli case
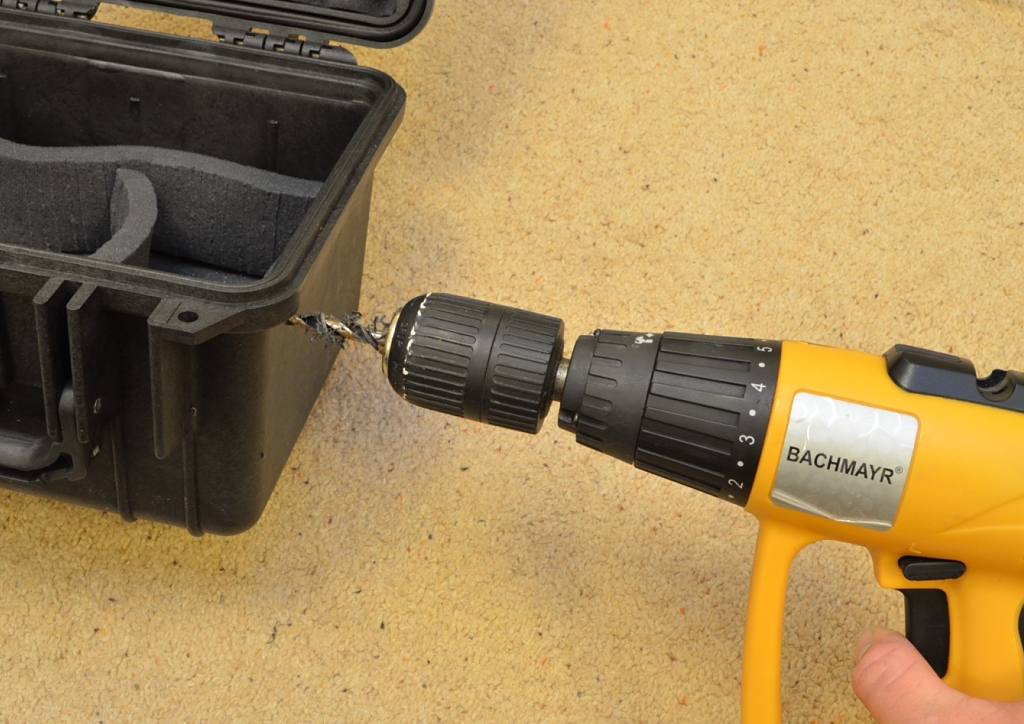
After you have fitted your batteries, take them back out again, as in the next stage you will be drilling into the case to make the holes that allow the power cables to enter.
Drill the smallest holes possible that will fit the cables through, and do it at the side of the case, below the lip.
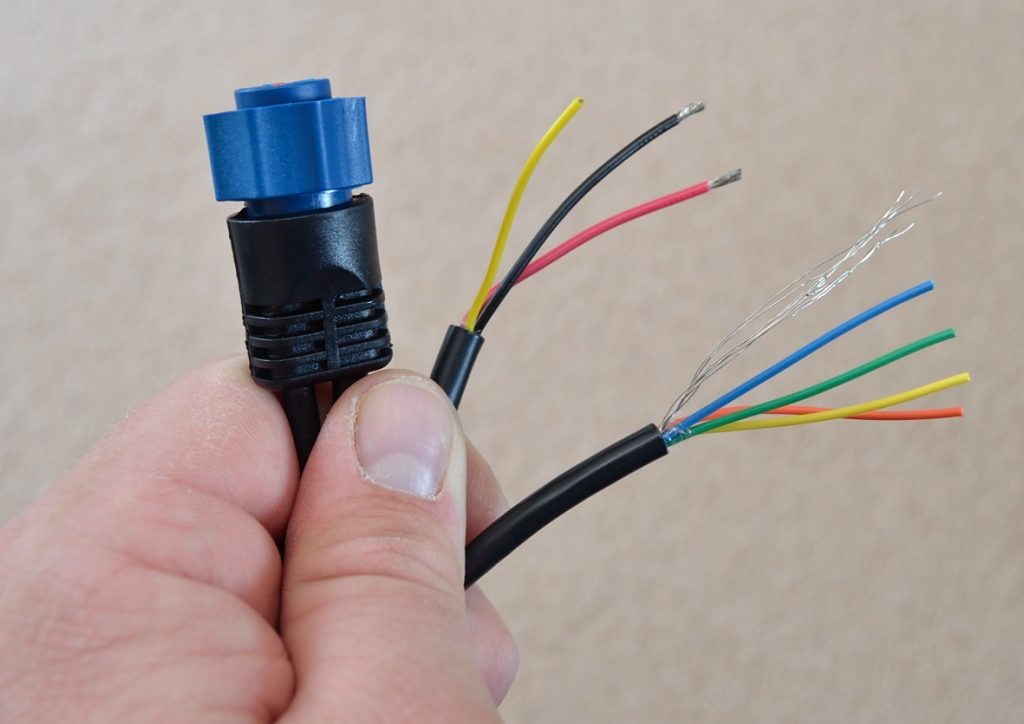
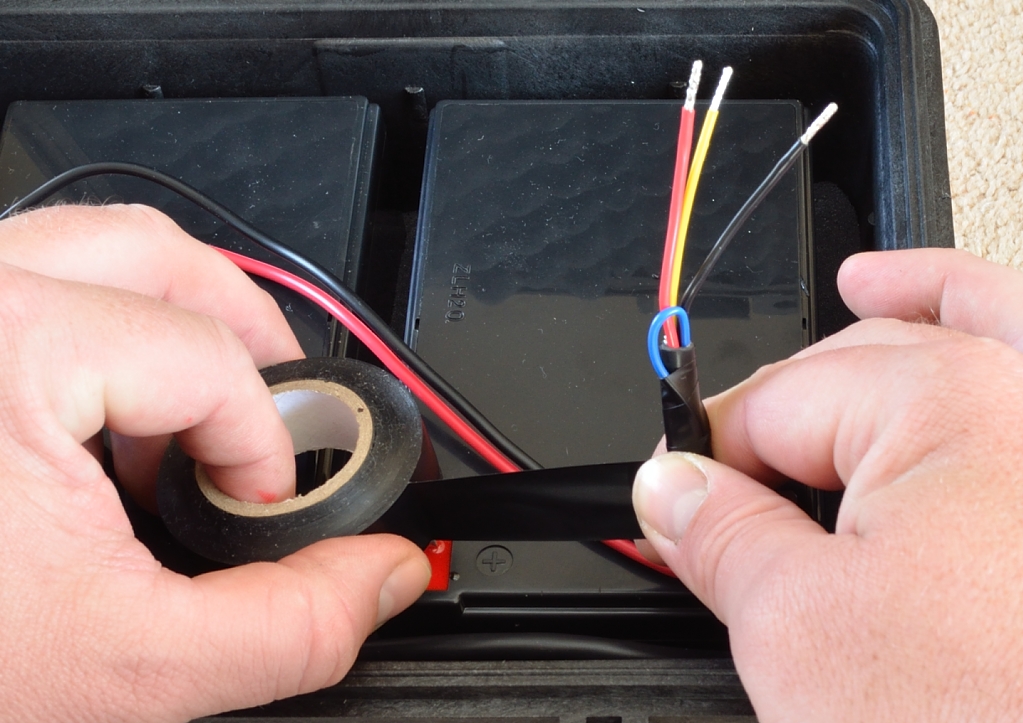
The HDS power cable comes split into two cables, one is for the standard power attachments (red, black, and yellow), the other is for networking NMEA devices (yellow, green, blue, orange), and this can be ignored as we aren’t going to be using this.
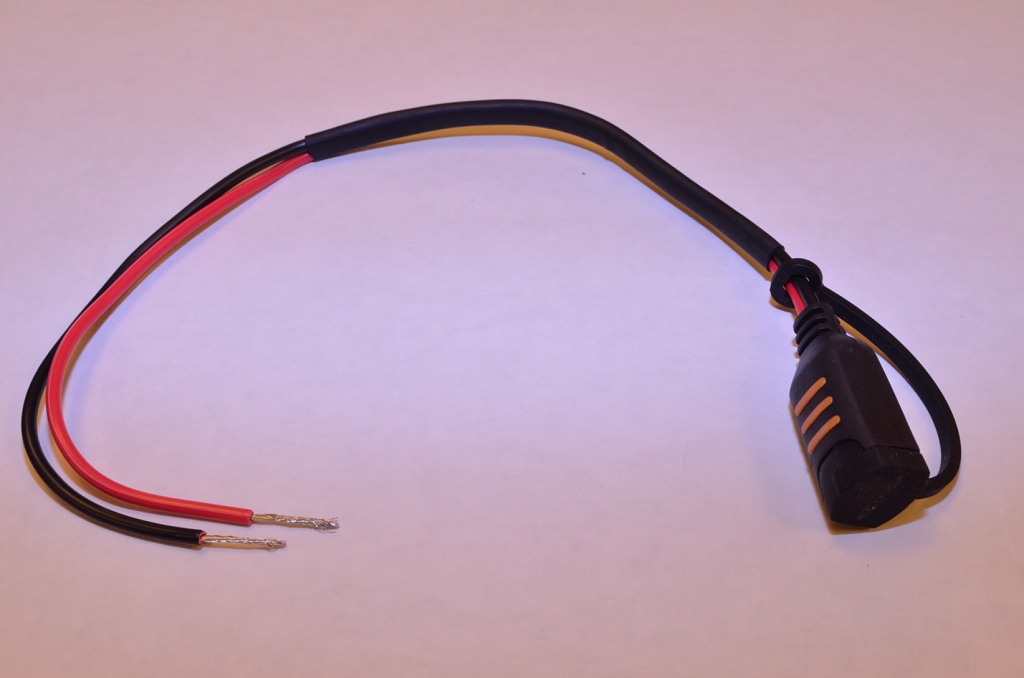
To make it neat, I simply shrink tube both cables together. Don’t be tempted to cut it short, as you may need to use it one day. What I have done here is just cut the wires off (so they are not sticking out) then put some silicon sealant over the end of the cable, and then put the heat shrink over the top. The shrink tube method also adds to make it waterproof.

Two other cables need to go into the Peli case- the power cable for the Structure Scan unit – this has red, black, yellow and blue wires coming out of it.
The other cable you need is a power cable from the battery charger, this is just a black and red.
The next thing is to reset your batteries and then thread all three cables into the Peli case, the cables should be a tight fit, and you can make it even more waterproof by sealing around the inside of the case where the cables come in with silicone sealant.
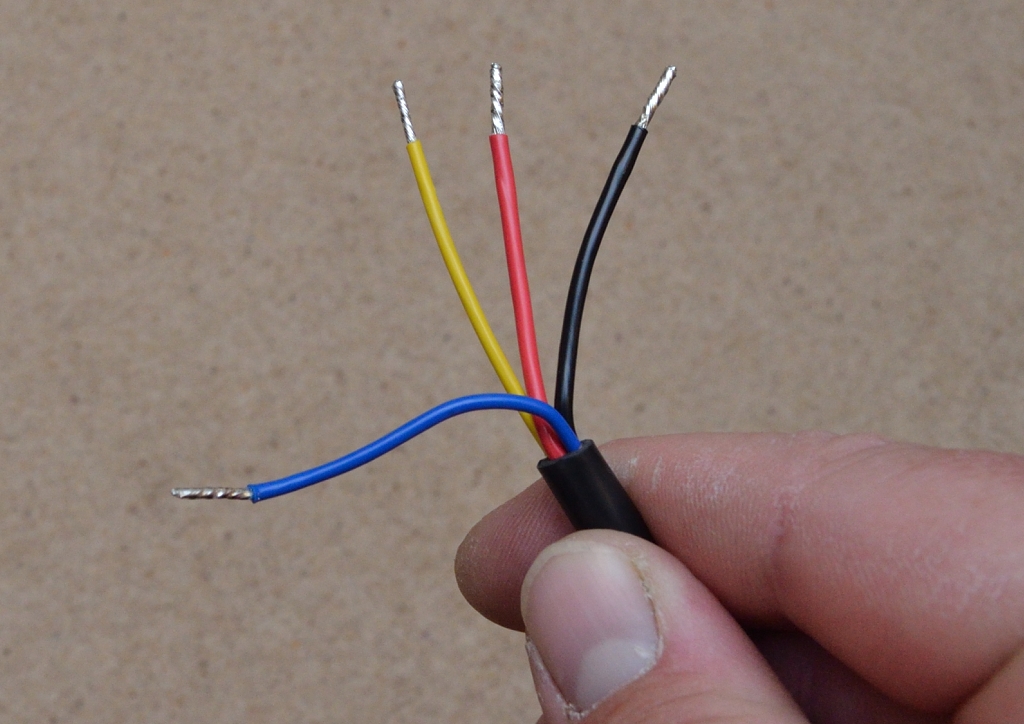
On the Structure Scan power cable, there is a blue wire, again this is not required for this build, so it’s simply a case of tidying it up so it can’t touch anything else. Here I just tape it back to the cable with some electrical tape.
The next thing to do is connect the wires together, the yellow wire on each cable needs to be connected together – this is the wire that controls switching the Structure Scan on or off from the HDS control unit. Basically this means that the Structure Scan won’t be on all the time as there is no physical ON/OFF button for it, and it is controlled digitally from the main HDS.
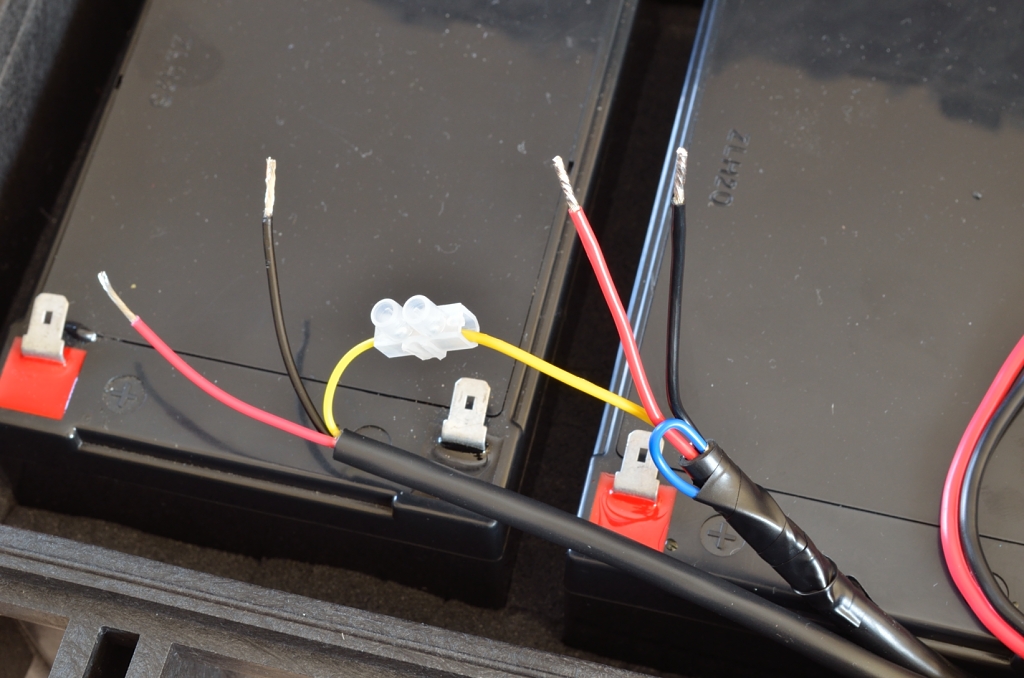
Then the black wires need to be connected, these need to go into a simple terminal block (I’ve cut one down here for simplicity), as we will be adding another wire to go to the batteries later.
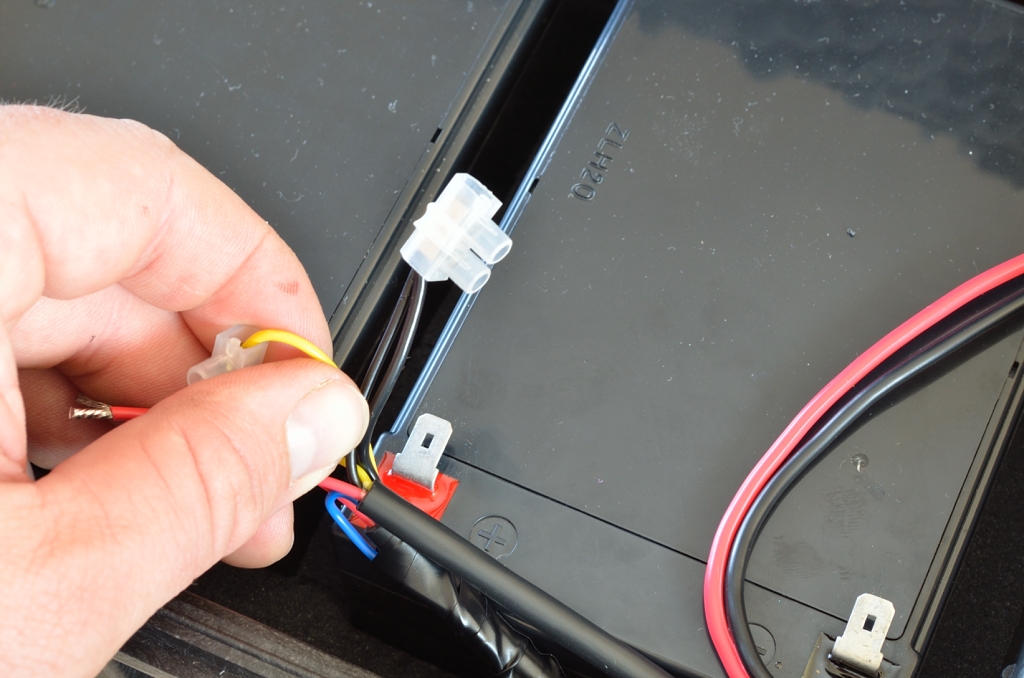
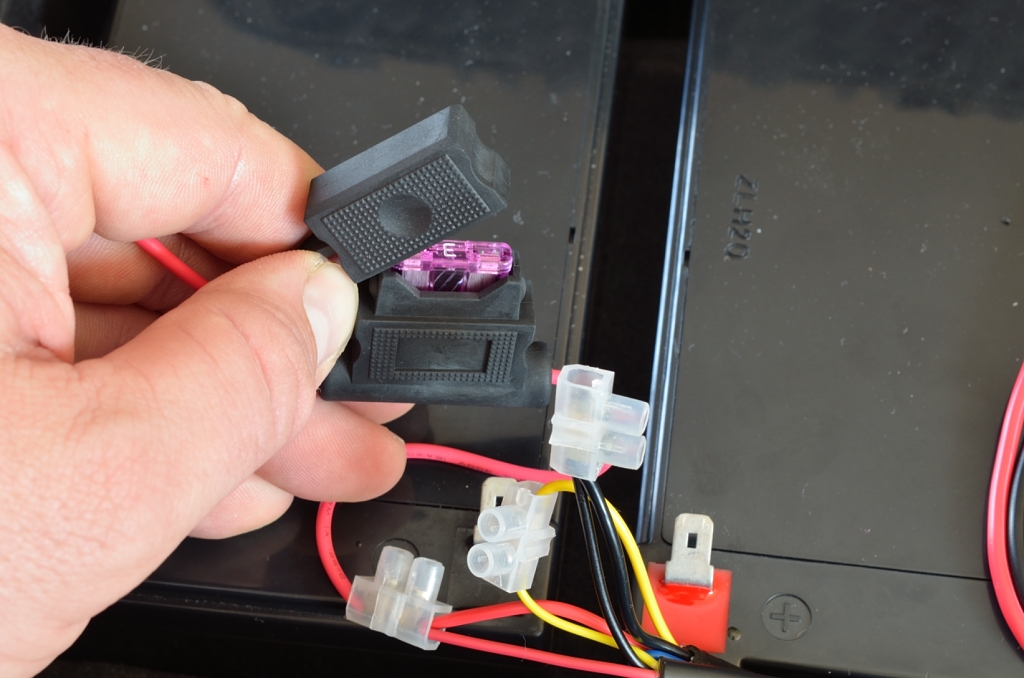
Then you need to do the same for the red wires, this time once you have put both of them into the terminal connector, on the other side this is where you put your fuse, (this comes with the HDS unit)
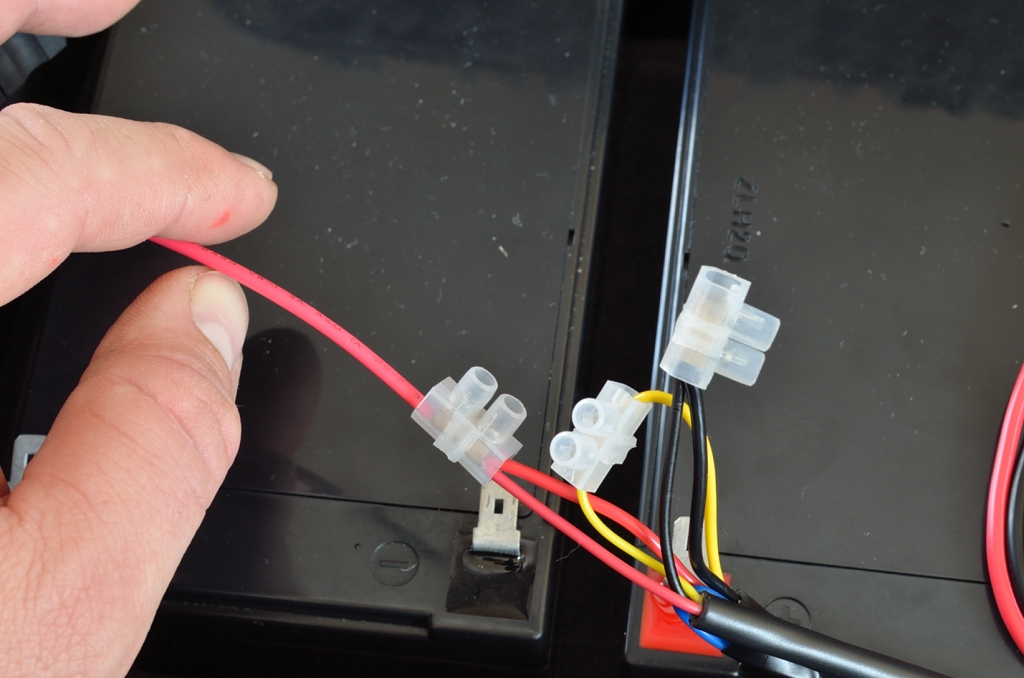
Next you need to attach a wire to the other side of the black connector, and for simplicity I use spade connectors, here I’ve put a female one on the end.
(you will also need a female connector on the end of your red fuse wire)
Then we need to rig the batteries in parallel this effectively makes them a 12v 24Ah battery, which should keep both units going for a running time of around 16 hrs, which is more than what I require for most boat trips. If you are planning to stay out longer than this, you will need a different battery set- up.
(The structure scan uses 0.75A and the HDS-10 uses 0.7A so total is going to be 1.45A)
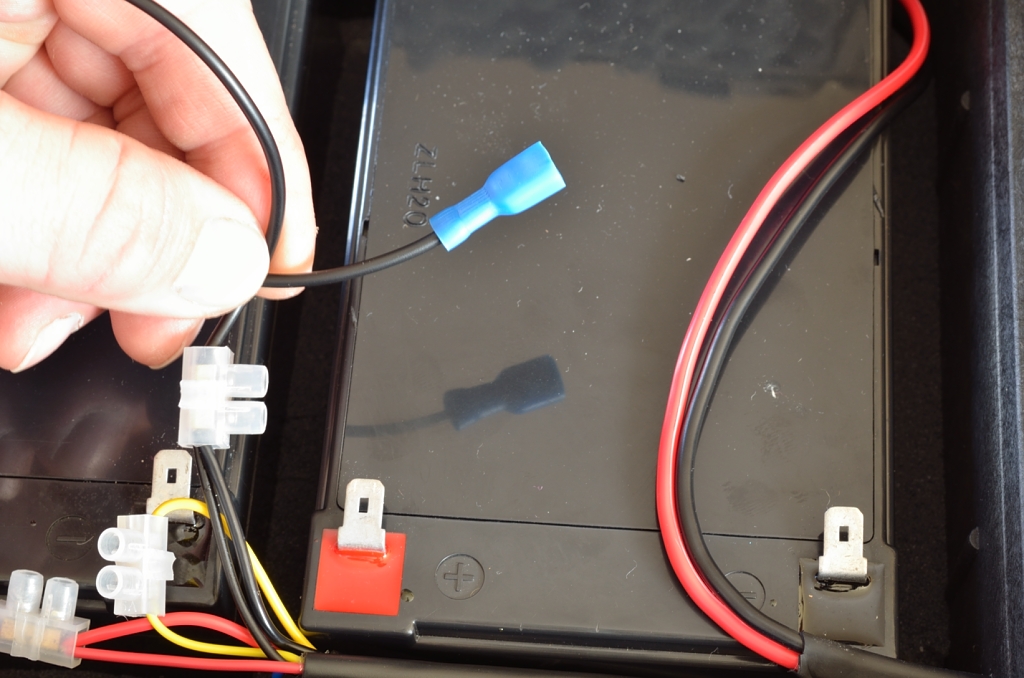
You need to rig up positive to positive (red to red) and negative to negative (black to black) to make them parallel. Here I have used female spade connectors with an additional male spade attachment this makes it easy to add all the other wires).
Next we add the battery charger cables – again for these I have used the female connectors with the male spade attachment. The black goes on the right battery, and the red goes on the other battery.
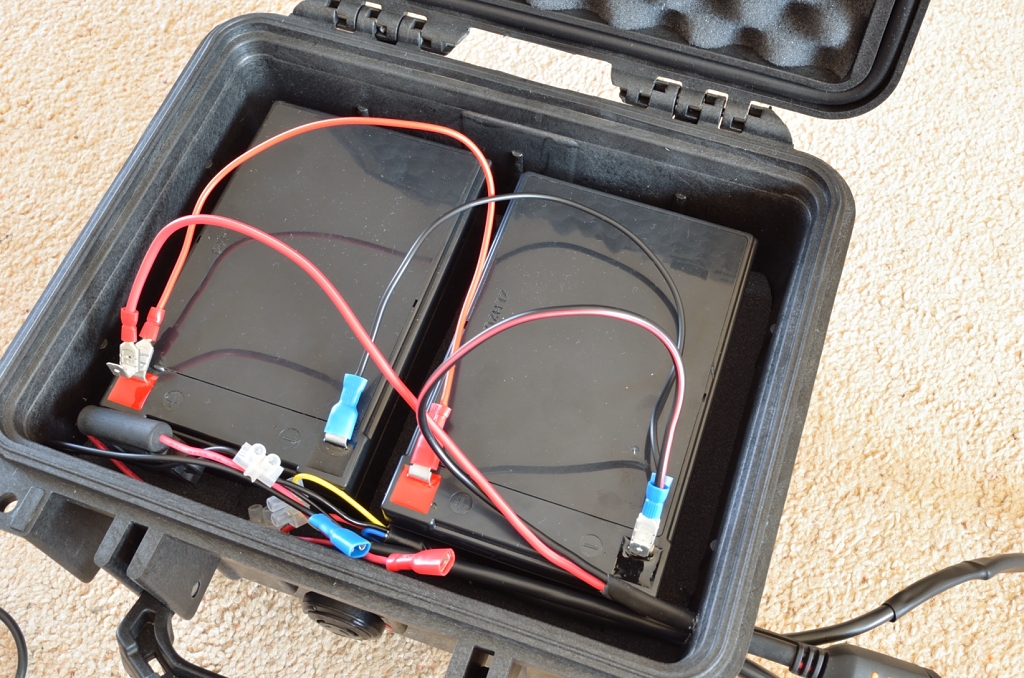
Finally we connect the power cable, the red positive wire with the fuse attachment goes on the left battery and the black negative one goes on the right battery, then you can close the case and never open it again! Hopefully! This really is the tricky bit over and done with, I promise. (If you need to you can tidy the cables up with some cable ties, but they shouldn’t move around much in there anyway)
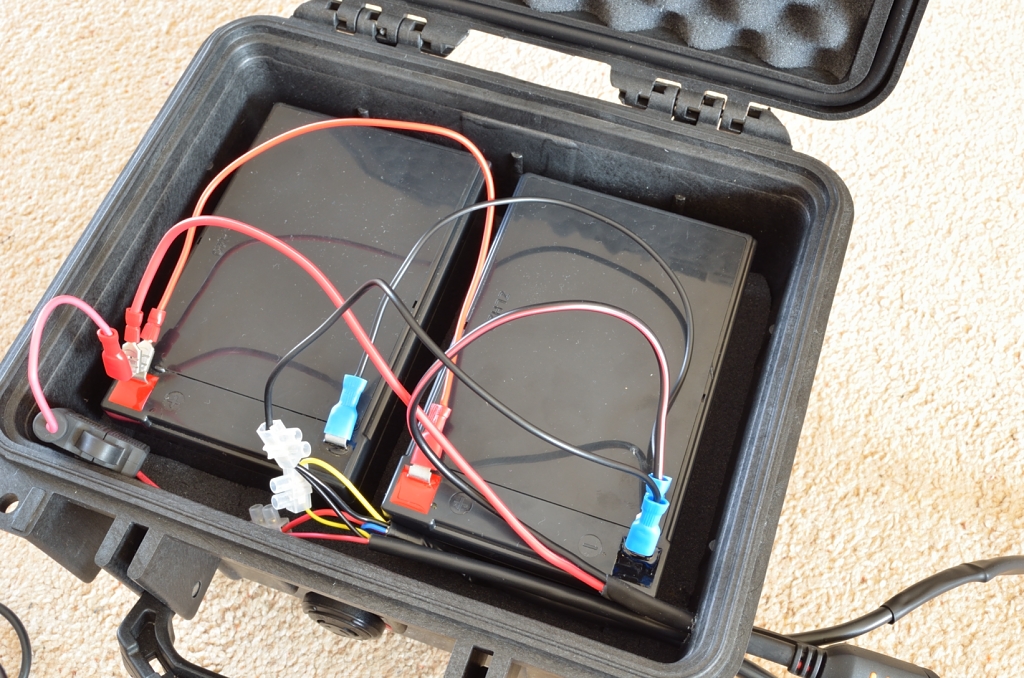
I put the rigged up Peli case into a seat box for easy transportation, just make sure you pack it in, so it doesn’t slip around, I used the spare foam I took out from the Peli cases for padding. All the cabling can then be stored in the box as well.
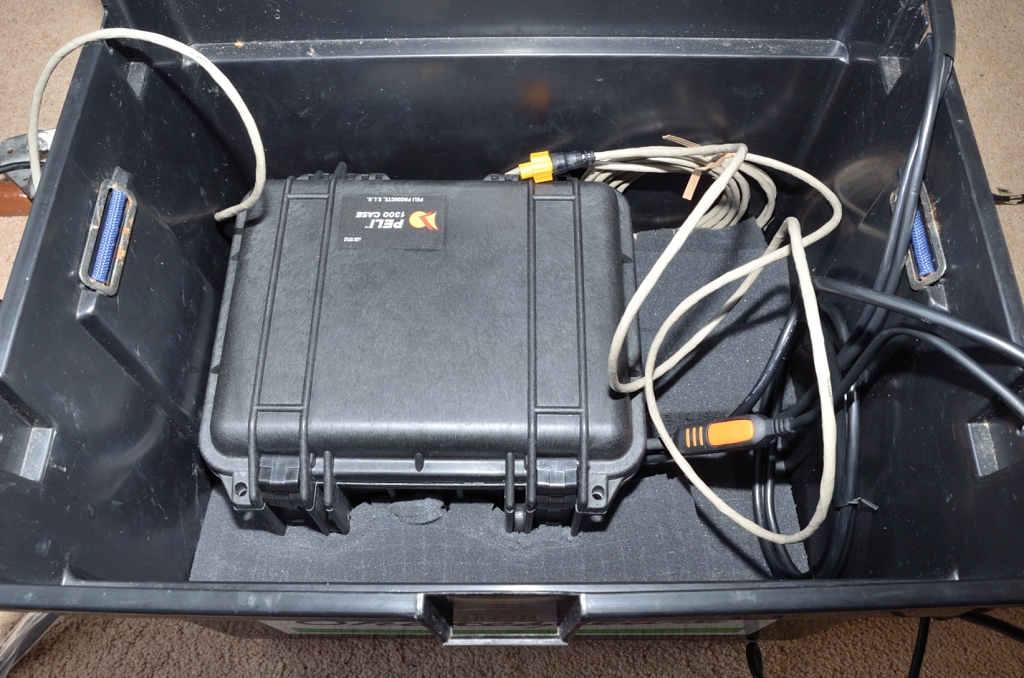
The Structure Scan unit then needs to go into the box as well. What I did was mount it on a cheap cutting board, to stop it banging around. This then sits on top of the battery case within your box, (I fixed mine in place with some stick- on Velcro patches). Also the Ctek charger can be placed in the box as well.
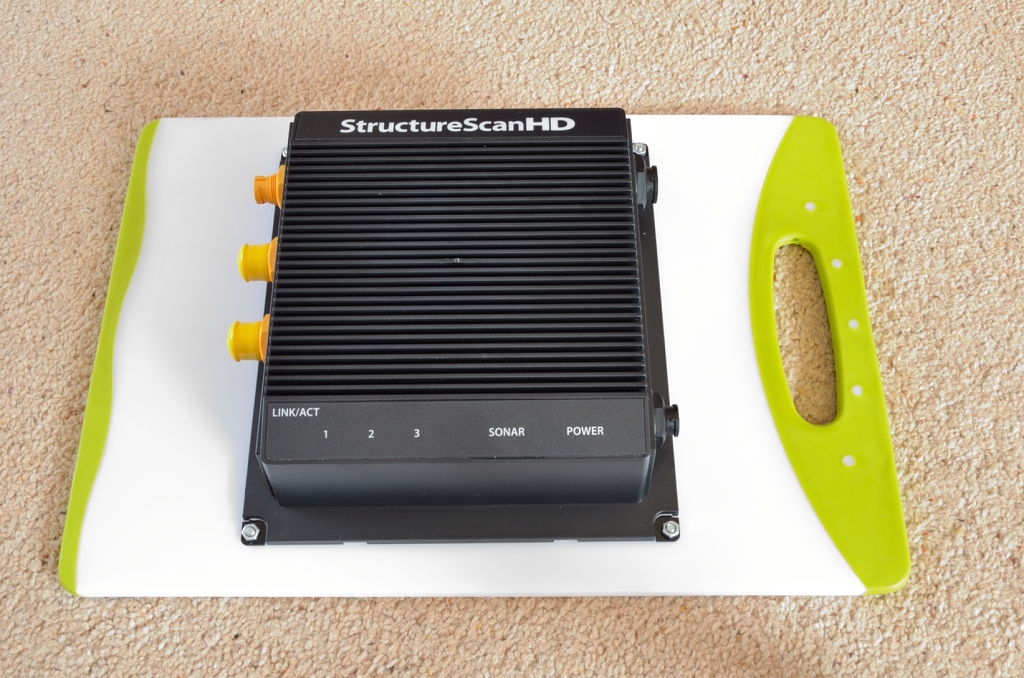
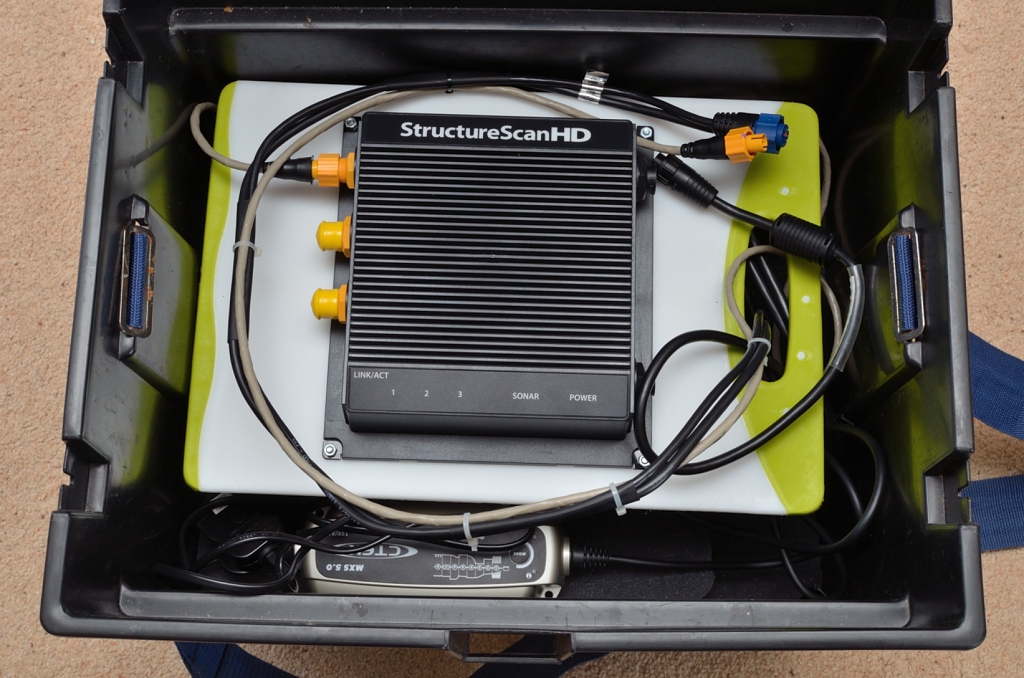
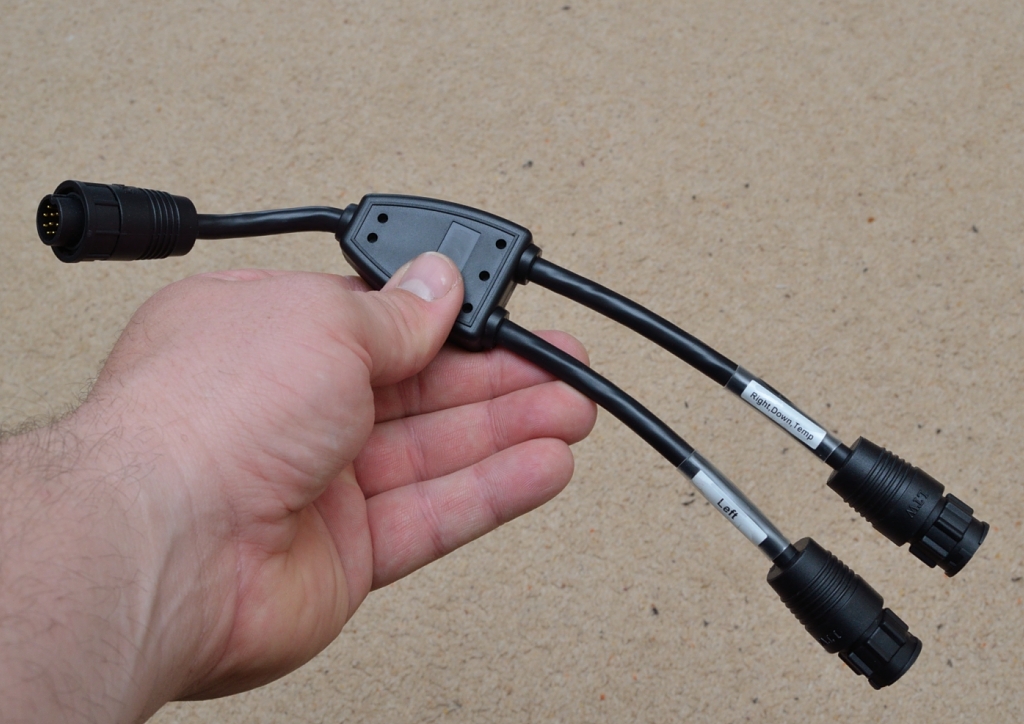
The only thing you may need, is a splitter cable for the Structure Scan transducers if you want to use two of them, one either side of the engine. I’ve only found I need double transducers on certain boats where you get interference at high speeds.
If you are going below 4knts I would stick with just the one.
This connector plugs straight into the Structure Scan and is conveniently labelled LEFT and RIGHT, so you really can’t get it wrong!
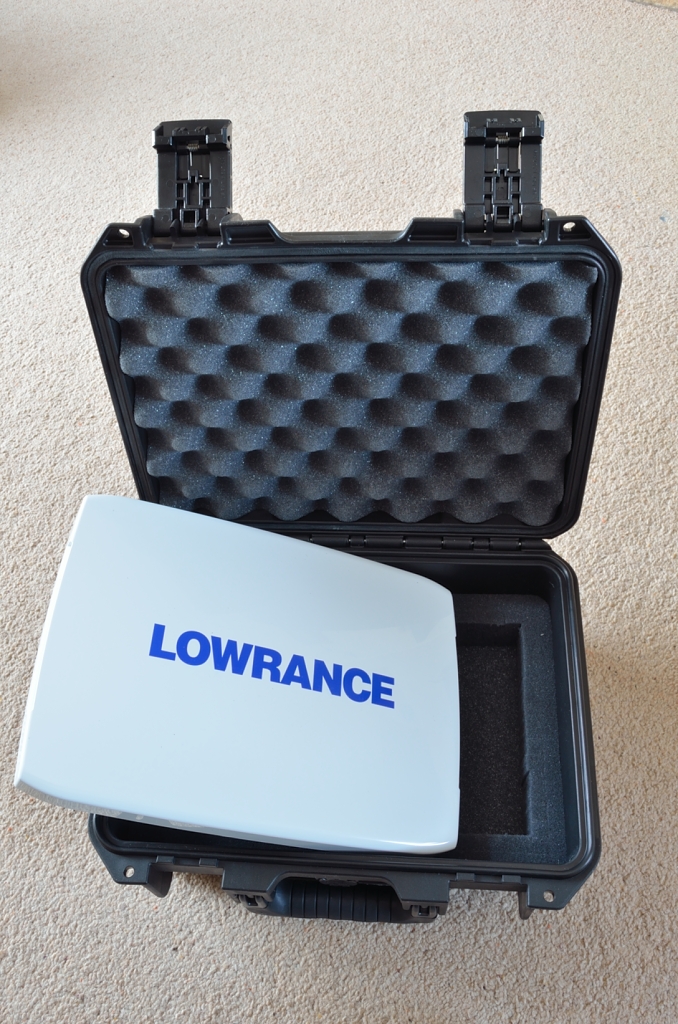
The only thing left to do is mount the HDS unit itself, here I have again used a Peli case, I use one big enough that the unit fits inside it when not in use, for protection – remembering that these units cost upward of £1500 makes you want to look after them!
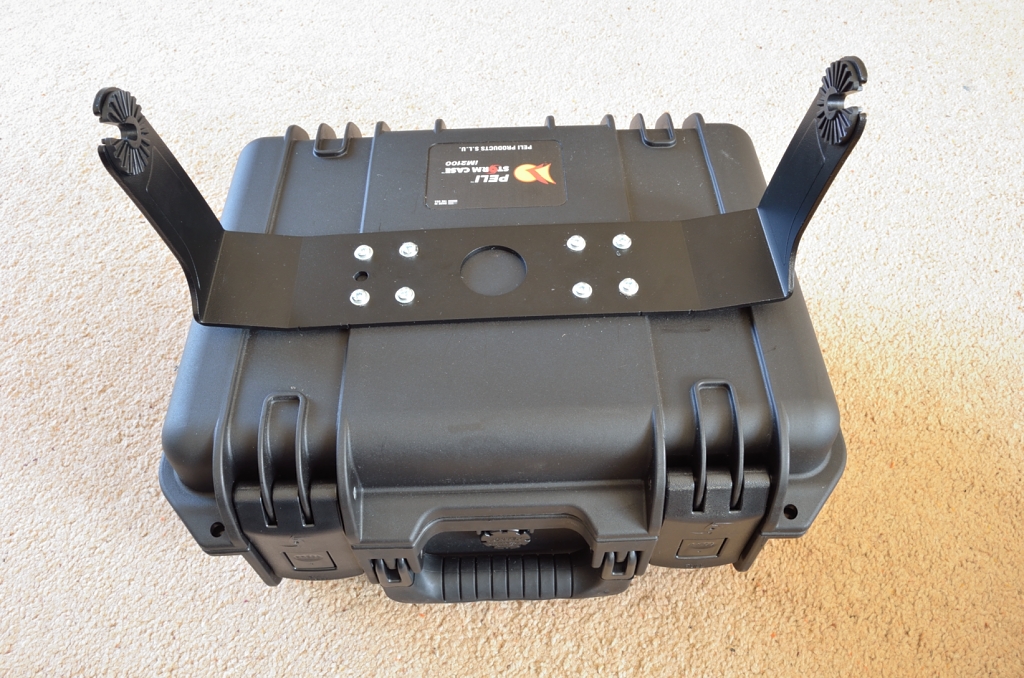
The mounting bracket is then fixed on top of the case, simply mark the holes and drill them out and then bolt it on. A bit of silicone sealant around the bolts make the inside nice and dry for storage of the unit.
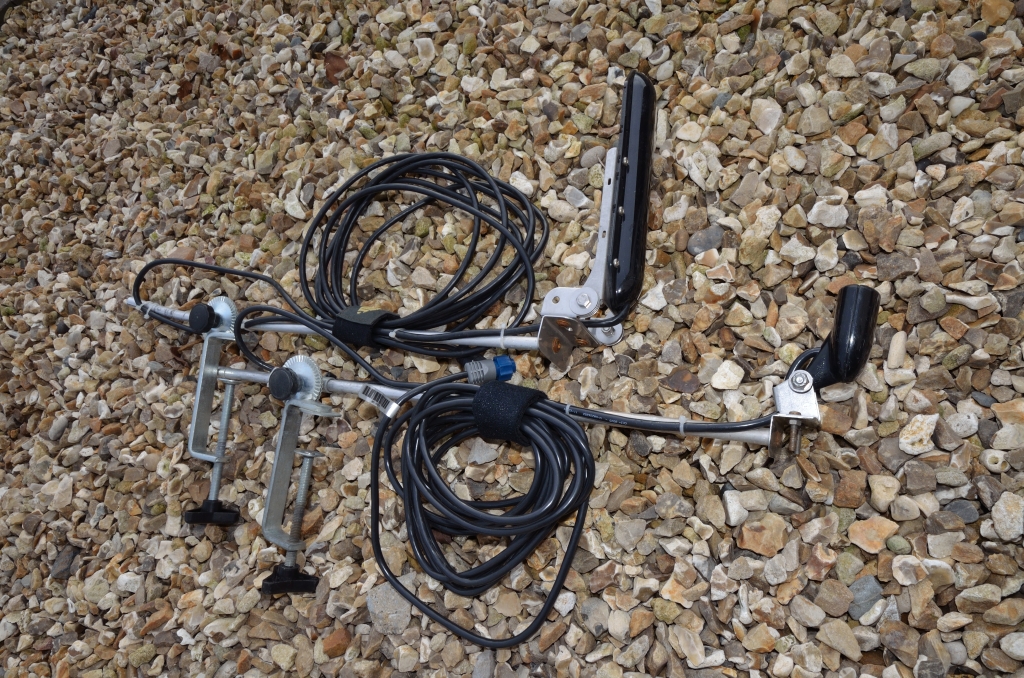
All that is needed now is to mount your transducers, there are loads of ways to do this, from simply fixing them to a board and G-clamping them to the boat, but I prefer the transducer brackets sold by Nev.
So there you go, a “How- To” guide to make something portable, that shouldn’t be! I know this has been geared towards the Lowrance units, but the same set- up could be used for other fish- finders, the important thing is not to be put off by the wiring as it really is quite easy.